Blog > How to Disconnect and Reconnect a Sectional Sofa
How To Disconnect And Reconnect A Sectional Sofa
Our sectional sofas are made of multiple pieces of free-standing furniture that securely connect together using metal fasteners. These fasteners keep the pieces from separating during regular use, but if you want to rearrange your sectional or move the pieces for cleaning, you'll need to disconnect them.
Don't worry — it's pretty easy. But it is a two-person job, so take a moment now to select a victim assistant.
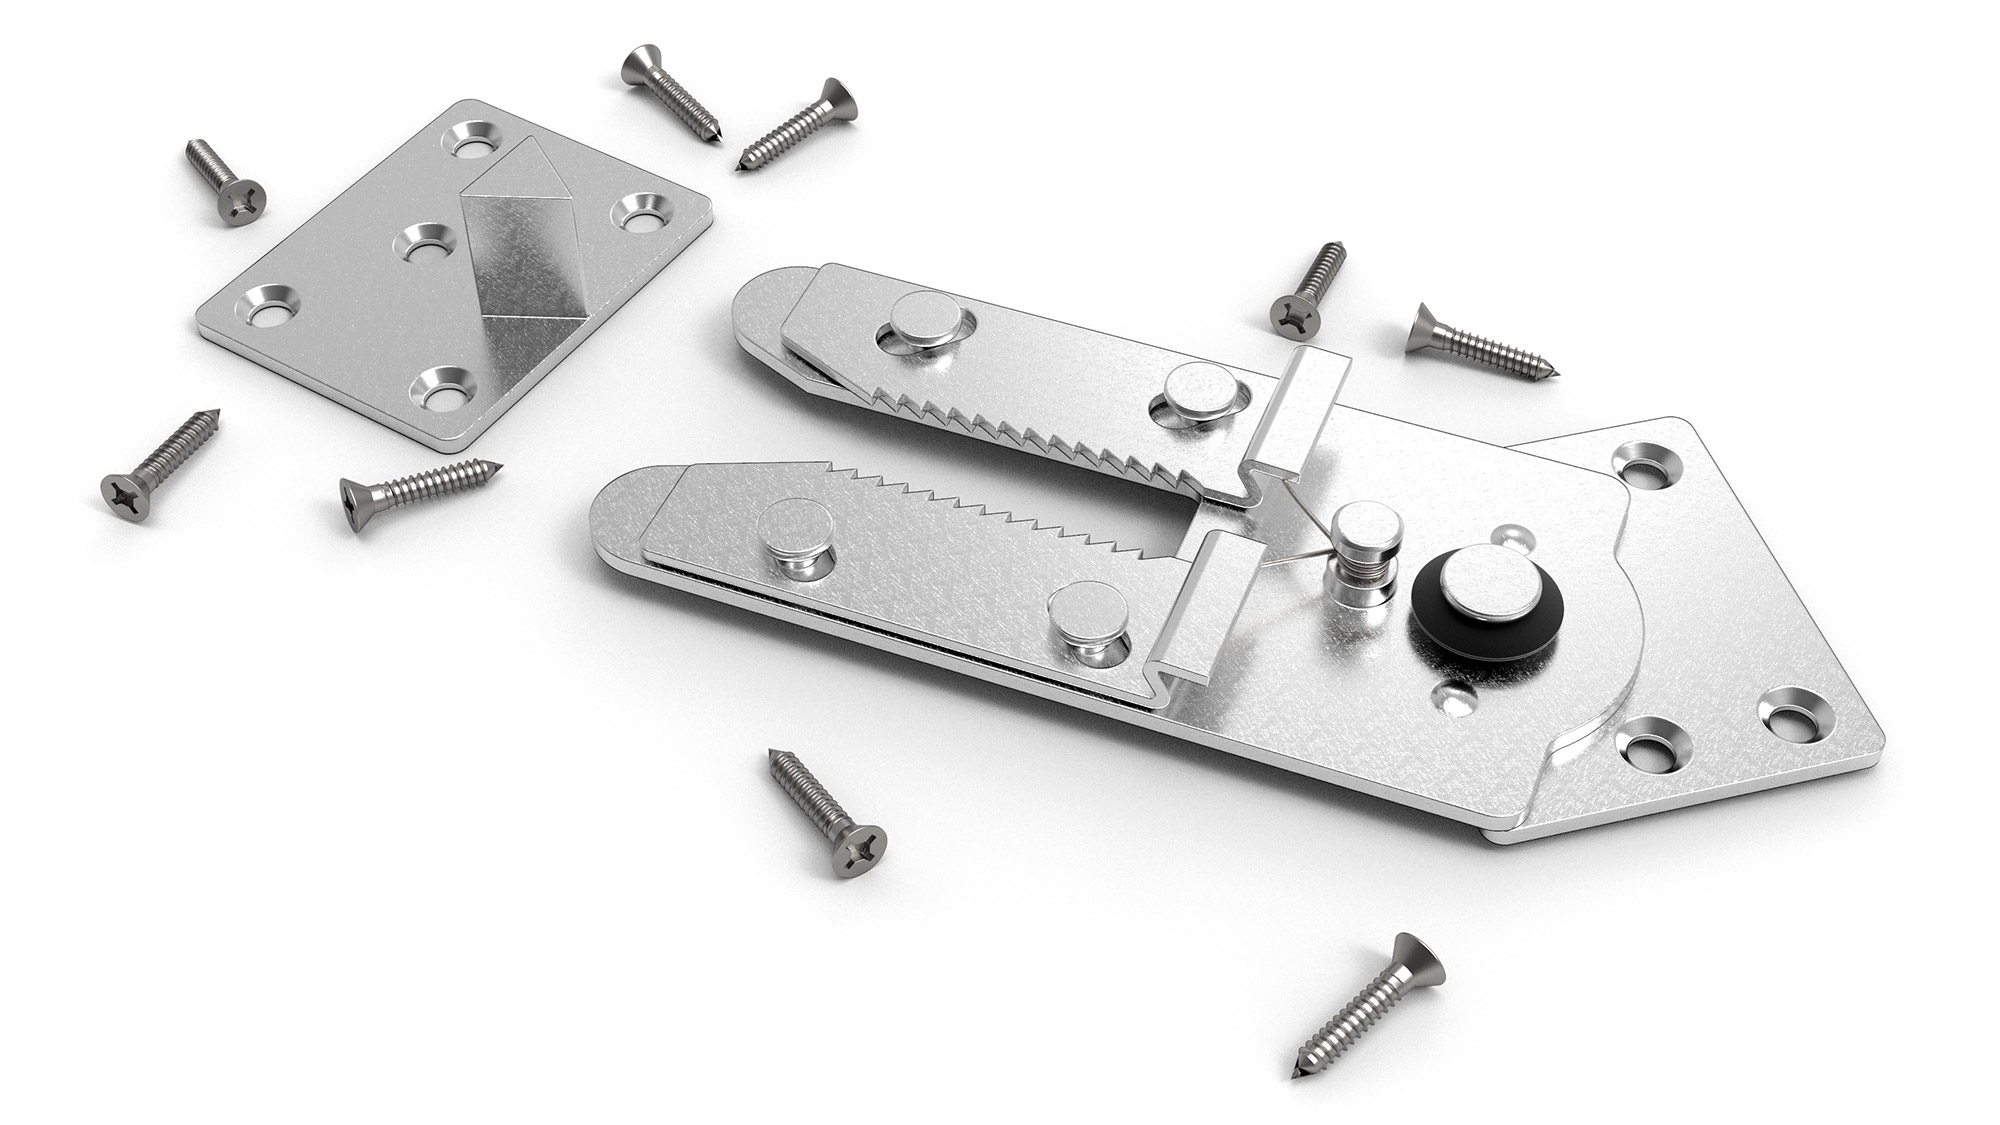
The pieces are connected using metal fasteners that are mounted on the underside of the furniture. Where pieces are connected together, one piece will have a pair of triangular metal posts that point down. The connecting piece will have a pair of self-ratcheting clips that grab onto the triangular posts. Neither of these pieces have technical names, so we can call them "posty parts" and "toothy parts" if you like. Or not.

Disconnecting your sectional sofa
To detach your sectional pieces, start on one side of the sectional and gently lift the piece near the connection to the adjacent piece. One of two things will happen:
1. You will feel the adjacent piece lift up along with the piece you are lifting, or
2. You will feel the piece you are lifting pull off, often accompanied by the sound of metal clicking, and the piece will come free.
In the event of #1 happening, stop lifting and gently set the piece back down. Start at the opposite side of the sectional and try again. We run connectors directionally across the piece, so moving the opposite side should ensure that the pieces detach.
In the event of #2, continue lifting and the entire piece will detach, allowing it to be pulled apart.
Reconnecting your sectional sofa
When you have repositioned the sectional pieces, reconnecting them is simple. Align the pieces and try to make sure the self-ratcheting clips are lined up with the triangular posts. The clips can be spun around a bit to get them lined up to the posts. Slowly push the pieces together. You should hear clicking noises as the clip teeth grab the posts. Push the pieces together as tight as possible until the clicking stops. You?re all set!
RELATED POSTS
Does My Room Need A Sectional?
How Do I Measure For A Sectional?


