Bedroom Board-and-Batten
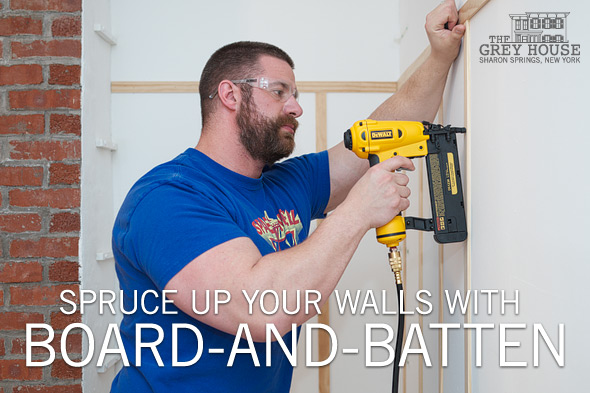
Above: Chris applies lattice to create a board-and-batten effect.
When we decorated our Modern Farmhouse in Austin, we hired a carpenter to spruce up the house's simple sheetrock walls with a board-and-batten look. Mimicking a style of wood paneling called - you guessed it - board-and-batten, this effect is created by applying narrow strips of wood to the walls.
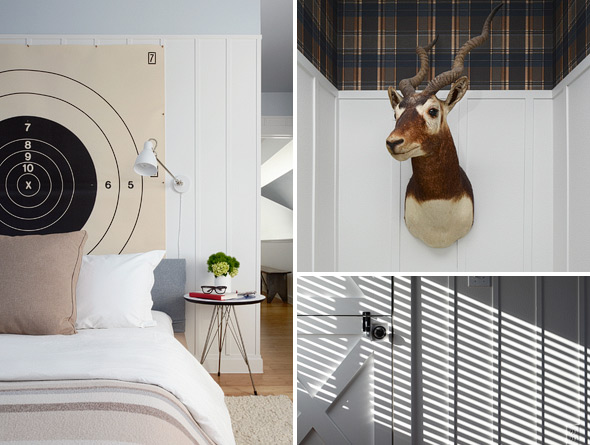
Above: Examples of the board-and-batten in our finished Modern Farmhouse.
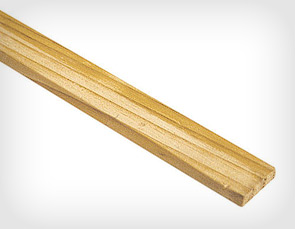
Above: A strip of lattice.

Above: A simple jigsaw.

Above: A pneumatic brad gun.
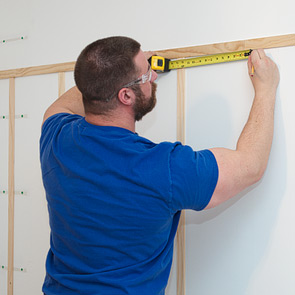
Above: Carefully measure out the spacing for your boards.

Above: Check that each board - horizontal as well as vertical - is level.
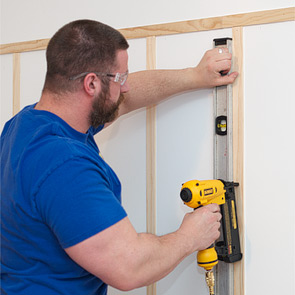
Above: Use the nail gun to apply several brads to each strip, double checking position with your level.
While we won't be applying this same treatment throughout the Grey House, Roger and I decided that it would make a nice addition to the look of our master bedroom. This time, I tackled the project myself. Here's how to do it and what you'll need for the project.
What you'll need.
Wood. Some people call them "lath," but they're more widely referred to as "lattice strips." Either way, these narrow strips are typically about 1/4 of an inch thick and anywhere from 1 to 2 inches wide. We opted for 1 3/8-inch strips. Most lumber yards price the strips by the linear foot. The strips may be as long as 15 feet, so bring a truck or have the shop cut them down for you. Expect to pay between 35 and 60 cents per foot. Be sure to keep an eye out for warped strips; you want pieces with nice, straight sides and badly-warped strips will be obvious once applied to your walls.
A saw. If you're fancy, you can use a miter saw to make clean, accurate cuts. If you're less fancy, you'll find that almost anything will cut through the thin lattice strips. I just fitted a fine wood blade to my little jigsaw, and it worked fairly well.
Nails. Technically, you can use finishing nails and a hammer to do this, but...it will take forever and you'll go insane. Instead, use this project as an excuse to rent or buy a new power tool! Nail guns (technically "brad guns" but that sounds less awesome) are available in electric, battery-powered, or pneumatic versions. I found an affordable pneumatic kit that had enough kick for a wide variety of projects. Between the air compressor refilling and the nail gun firing, the setup makes a ton of noise and will wake your husband from his nap. Not that I'm speaking from experience.
A big level, a tape measure, a pencil, and some wood filler. If you're an excellent carpenter, your measurements and cuts will be so accurate that no wood filler is required to close up any gaps in your work. I am not an excellent carpenter.
Safety goggles. There's no way to explain why these are important without sounding like a high school shop class safety film from the 1950s. They're like $5. Just buy a pair.
Step 1: Place the top and bottom strips.
You're aiming to create a paneling effect with this wall treatment. As you know, some homes have paneling that only runs a third of the way up the walls while others have paneling that extends all the way from the baseboards to the ceiling. This is an aesthetic choice. For our bedroom, we wanted the paneling to come up to around six feet. When this room has been completed, the "paneling" portion of the wall - lattice strips and the sheetrock between them - will be painted white, while the remainder of the wall above will be a contrasting color.
Start with the top strip. Run lattice around the room at a consistent height. If you have a new house with level floors, this should be easy. Just measure up from the floor or down from the ceiling, and use a level to check your work. If you have an old house with wonky floors and sloping ceilings...uhm...improvise.
Do the same routine with the bottom strip. Get as close to the baseboards as you can. If the room has unmatched baseboards of varying heights like our house does, well, once again, improvise. And trust that, once the lattice and walls are painted the same color, these imperfections will all be less noticeable.
Step 2: Apply vertical strips.
Another aesthetic choice for you to make is the spacing between vertical boards. I mounted our bedroom's strips one foot apart. I've found it easiest to mark the position of all of the boards for one wall with a measuring tape and pencil, checking and adjusting the layout for obstacles (see Step 3), before starting to cut the strips down to size.
If you have wonky floors and walls like us, be sure to measure for strip length at each of the positions you've marked. In our bedroom, despite having a perfectly level top strip, the changing floor level meant that the strips on one end of the wall were as much as one inch shorter than those at the opposite end.
When nailing the strips, start at the top with a single nail. Use your level to verify that the strip is perfectly vertical before fixing it in place with additional nails. Speaking of which, if you have wavy walls, you may want to be liberal with use of nails. You may find that there are a few unsightly gaps between the wood and wall. Adding a few extra nails will help hold the very flexible lattice tight against the wall.
Step 3: Dealing with doors, windows, and outlets.
Most rooms have all kinds of details that get in the way. Doors and windows are more complex if your board-and-batten extends above them; consider making your life easier and positioning the top strip beneath the tops of the room's doors and windows. Doors are pretty simple; just let the top and bottom strips die into the trim. Windows will require short little strips beneath them. If you have groups of doors or windows with a narrow span of wall between them, try to plan out the spacing of your vertical strips to allow at least one strip to run on the narrow span. This will help make the effect more convincing.
Outlets and light switches are trickier. While you can cut short pieces to fit around them, I would recommend adjusting the spacing of your vertical strips by a few inches to avoid them altogether. If you can't make the spacing work out perfectly, remember that you can cheat. Just nudge a strip an inch or two over to avoid your obstacle. It may look obvious when the strip is a different color than the wall behind it, but once the room is repainted, it will be almost impossible to see.
Our bedroom's walls are now ready for paint. And this project took far less time than I'd anticipated. The biggest challenge of the project, believe it or not, was finding a lumber yard that had enough lattice. We had to make a few runs to area stores and still didn't get quite enough on our first day of shopping. (If you're curious, we spent about $160 on wood for the room.)
Stay tuned for more master bedroom projects!
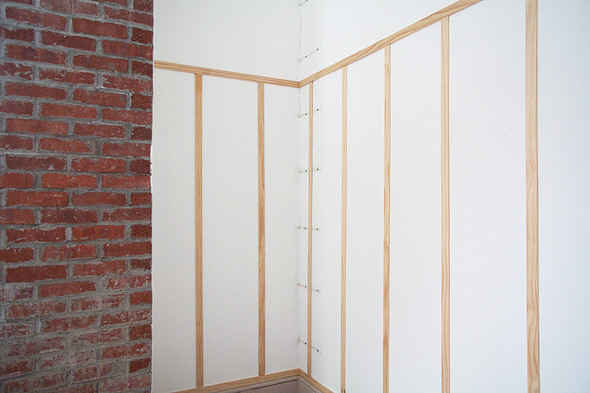
Above: With the board-and-batten treatment finished, the bedroom walls are ready for paint.